
is an IT Service Provider that specializes in Cloud First, Cloud Only Infrastructure, CyberSecurity, and Enabling Our Clients to Work From Anywhere.
[/et_pb_fullwidth_header][/et_pb_section][et_pb_section fb_built="1" use_custom_gutter="on" gutter_width="2" specialty="on" padding_top_bottom_link_1="true" padding_top_bottom_link_2="true" padding_top_1="0px" padding_top_2="0px" padding_bottom_1="0px" padding_bottom_2="0px" admin_label="Main Button Bar" _builder_version="3.22" background_color="rgba(255,255,255,0)" inner_width="100%" inner_max_width="100%" custom_margin="-36px|||" custom_padding="0||4px||false|false" da_disable_devices="off|off|off" use_custom_width="on" width_unit="off" custom_width_percent="100%" global_module="257" saved_tabs="all" da_is_popup="off" da_exit_intent="off" da_has_close="on" da_alt_close="off" da_dark_close="off" da_not_modal="on" da_is_singular="off" da_with_loader="off" da_has_shadow="on"][et_pb_column type="1_2" _builder_version="3.25" custom_padding="|||" custom_padding__hover="|||"][et_pb_blurb title="Schedule a call" url="#bookings" url_new_window="on" content_max_width="1100px" content_max_width_last_edited="off|desktop" _builder_version="4.8.0" header_font="Open Sans|700||on|||||" header_text_color="#000000" header_font_size="14px" header_letter_spacing="3px" header_line_height="2em" body_font="||||||||" background_color="#2573f9" use_background_color_gradient="on" background_color_gradient_start="#ffffff" background_color_gradient_end="#ffc000" background_color_gradient_direction="90deg" text_orientation="right" custom_padding="20px|40px|12px|40px|false|true" animation_style="slide" animation_direction="left" animation_intensity_slide="5%" border_radii="||100px|100px|" locked="off"][/et_pb_blurb][/et_pb_column][et_pb_column type="1_2" specialty_columns="2" _builder_version="3.25" custom_padding="|||" custom_padding__hover="|||"][et_pb_row_inner column_structure="1_2,1_2" custom_padding_last_edited="on|desktop" _builder_version="3.25" custom_padding="0|25%|0|0px|true|false" custom_padding_tablet="|10%||10%||true" custom_padding_phone=""][et_pb_column_inner type="1_2" saved_specialty_column_type="1_2" _builder_version="3.25" custom_padding="|||" custom_padding__hover="|||"][et_pb_button button_url="tel:6309384757" button_text="(630) 938-4757" button_alignment="center" _builder_version="4.8.0" custom_button="on" button_text_size="14px" button_text_color="#000000" button_bg_color="#ffc000" button_bg_color_gradient_start="#ffa727" button_bg_color_gradient_end="#FF8A3D" button_bg_color_gradient_direction="90deg" button_border_width="0px" button_border_radius="100px" button_letter_spacing="3px" button_font="Open Sans|700||on|||||" button_use_icon="off" custom_padding="23px|24px|23px|24px|true|true" animation_style="slide" animation_direction="left" animation_intensity_slide="70%" button_border_radius_hover="100px" button_letter_spacing_hover="5px" button_bg_color_hover="#3980f9" locked="off" button_text_size__hover_enabled="off" button_one_text_size__hover_enabled="off" button_two_text_size__hover_enabled="off" button_text_color__hover_enabled="off" button_one_text_color__hover_enabled="off" button_two_text_color__hover_enabled="off" button_border_width__hover_enabled="off" button_one_border_width__hover_enabled="off" button_two_border_width__hover_enabled="off" button_border_color__hover_enabled="off" button_one_border_color__hover_enabled="off" button_two_border_color__hover_enabled="off" button_border_radius__hover_enabled="on" button_border_radius__hover="100px" button_one_border_radius__hover_enabled="off" button_two_border_radius__hover_enabled="off" button_letter_spacing__hover_enabled="on" button_letter_spacing__hover="5px" button_one_letter_spacing__hover_enabled="off" button_two_letter_spacing__hover_enabled="off" button_bg_color__hover_enabled="on|hover" button_bg_color__hover="#f1f1f1" button_one_bg_color__hover_enabled="off" button_two_bg_color__hover_enabled="off" button_bg_enable_color__hover="on"][/et_pb_button][/et_pb_column_inner][et_pb_column_inner type="1_2" saved_specialty_column_type="1_2" _builder_version="3.25" custom_padding="|||" custom_padding__hover="|||"][et_pb_button button_url="https://signalit.net/about/" button_text="about us" button_alignment="center" _builder_version="4.8.0" custom_button="on" button_text_size="14px" button_text_color="#000000" button_bg_color="#ffc000" button_bg_color_gradient_start="#ffa727" button_bg_color_gradient_end="#FF8A3D" button_bg_color_gradient_direction="90deg" button_border_width="0px" button_border_radius="100px" button_letter_spacing="3px" button_font="Open Sans|700||on|||||" custom_padding="23px|24px|23px|24px|true|true" animation_style="slide" animation_direction="left" button_text_color_tablet="" button_text_color_phone="" button_text_color_last_edited="on|desktop" button_border_radius_hover="100px" button_letter_spacing_hover="5px" button_bg_color_hover="#3980f9" locked="off" button_text_size__hover_enabled="off" button_one_text_size__hover_enabled="off" button_two_text_size__hover_enabled="off" button_text_color__hover_enabled="off" button_one_text_color__hover_enabled="off" button_two_text_color__hover_enabled="off" button_border_width__hover_enabled="off" button_one_border_width__hover_enabled="off" button_two_border_width__hover_enabled="off" button_border_color__hover_enabled="off" button_one_border_color__hover_enabled="off" button_two_border_color__hover_enabled="off" button_border_radius__hover_enabled="on|desktop" button_border_radius__hover="100px" button_one_border_radius__hover_enabled="off" button_two_border_radius__hover_enabled="off" button_letter_spacing__hover_enabled="on" button_letter_spacing__hover="5px" button_one_letter_spacing__hover_enabled="off" button_two_letter_spacing__hover_enabled="off" button_bg_color__hover_enabled="on|desktop" button_bg_color__hover="#f1f1f1" button_one_bg_color__hover_enabled="off" button_two_bg_color__hover_enabled="off" button_bg_enable_color__hover="on"][/et_pb_button][/et_pb_column_inner][/et_pb_row_inner][/et_pb_column][/et_pb_section][et_pb_section fb_built="1" _builder_version="4.9.7" _module_preset="default" da_disable_devices="off|off|off" da_is_popup="off" da_exit_intent="off" da_has_close="on" da_alt_close="off" da_dark_close="off" da_not_modal="on" da_is_singular="off" da_with_loader="off" da_has_shadow="on"][et_pb_row _builder_version="4.9.7" _module_preset="default"][et_pb_column type="4_4" _builder_version="4.9.7" _module_preset="default"][et_pb_post_title author="off" comments="off" featured_image="off" _builder_version="4.9.7" _module_preset="default" title_font="|600|||||||" title_text_color="#FFC000" title_font_size="36px" meta_font_size="24px"][/et_pb_post_title][/et_pb_column][/et_pb_row][et_pb_row _builder_version="4.9.7" _module_preset="default"][et_pb_column type="4_4" _builder_version="4.9.7" _module_preset="default"][et_pb_text _builder_version="4.9.7" _module_preset="default" text_font_size="20px" custom_margin="||59px|||" link_option_url_new_window="on"]Recently, we had a client contact us for assistance with how they could receive large files from their accountant’s office. They had attempted to have the files emailed over to them, but the email server that the client is using has a maximum message size limitation of 25 MB. These limitations are becoming more common, even Google has restricted the attachment size. Microsoft has built in a great feature that anyone with a Microsoft 365 (Office 365) for business account can use to solve this issue with Request Files in OneDrive for Business. With Request Files, you can upload files up to 250 GB each, that is 10,000 times the capacity of sending an attachment via email! With end-to-end encryption built into the OneDrive portal by default, this can also be a great way to protect any confidential data that would need to be shared with you as well. Here is how you can setup your own folder and use the Request Files service.[/et_pb_text][et_pb_text _builder_version=”4.9.7″ _module_preset=”default” text_font_size=”20px” ol_line_height=”1.3em” hover_enabled=”0″ sticky_enabled=”0″]Create the Request Files URL
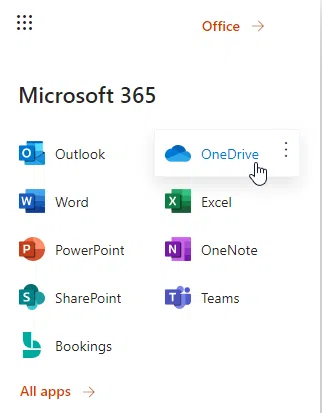
- Go to https://portal.office.com and login to your Microsoft 365 for business account. Open OneDrive from the waffle menu in the upper left

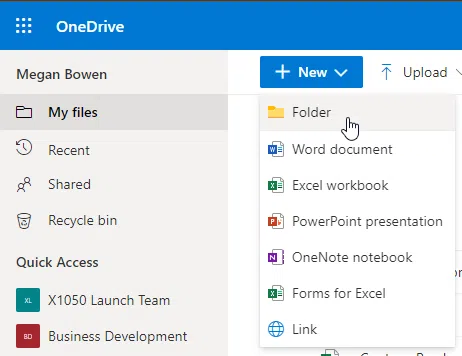
- Create a new folder where the Requested Files will be uploaded

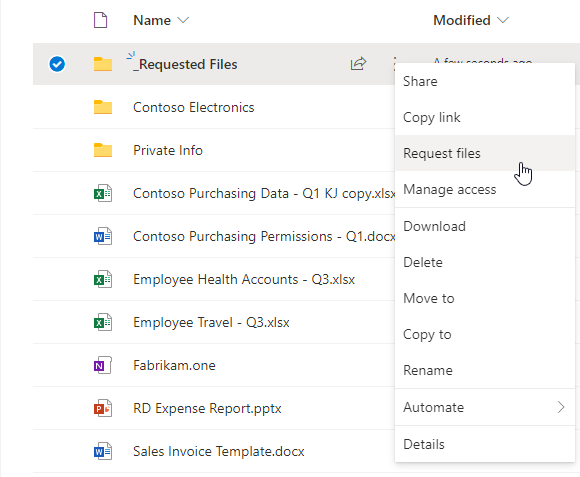
- Click on the vertical ellipsis next to the new folder and select Request files

- In the “What files are you requesting?” box, type in a friendly name that will be presented to the person you are requesting files from. Click the Next button to generate the new URL.

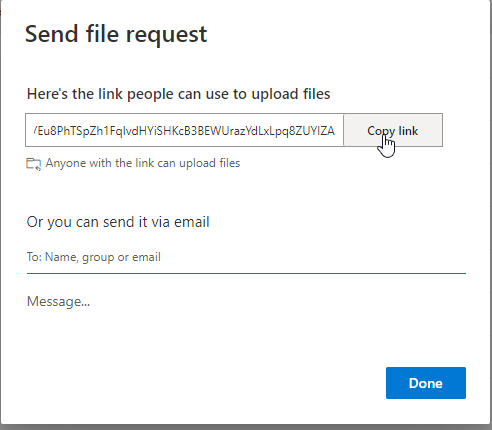
- You will be presented with the new Request Files URL. You can copy it from here and email it to the anyone that you want to request files from. You can also send an email to someone directly in this window too.


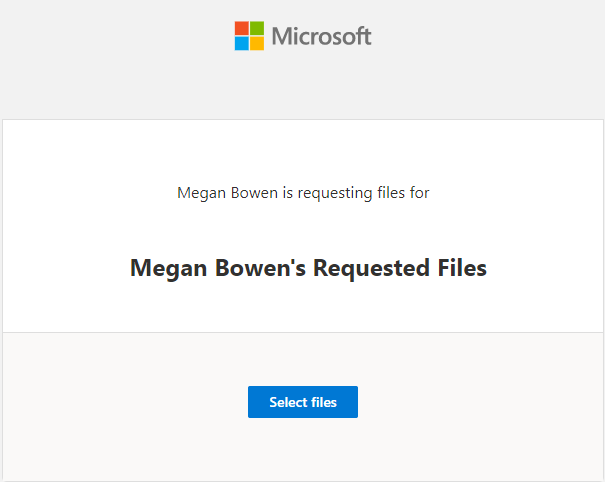
What the person receiving the request sees
- When the receiver clicks on the URL that you sent them, they will be taken to a website that has a button to Select files.

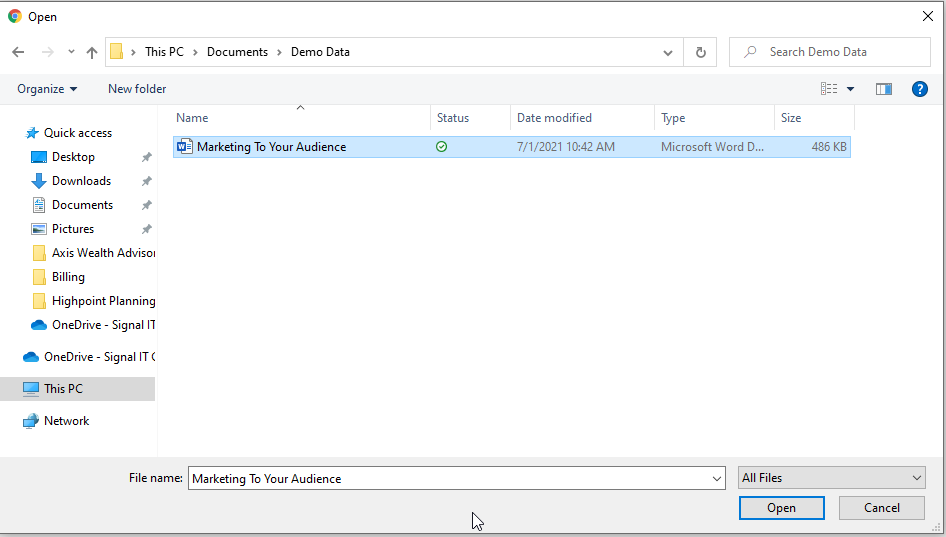
- When the Select files button is clicked, it will take them to the folders on their computer to pick which files to send to you.

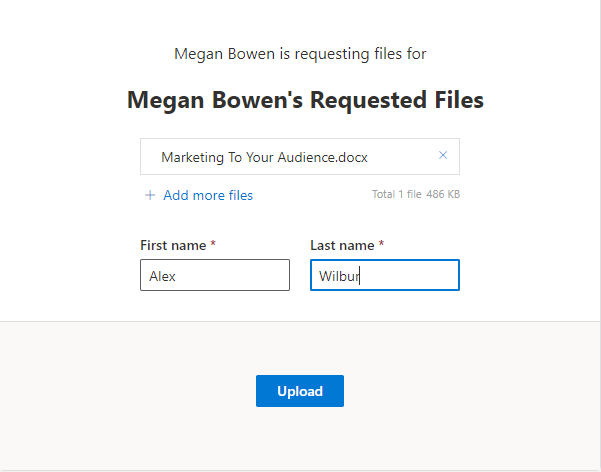
- The sender will be taken back to the main window and provided with an opportunity to upload more files. Also, the sender will be prompted to enter their name. This is important for the file naming for when you receive the files.

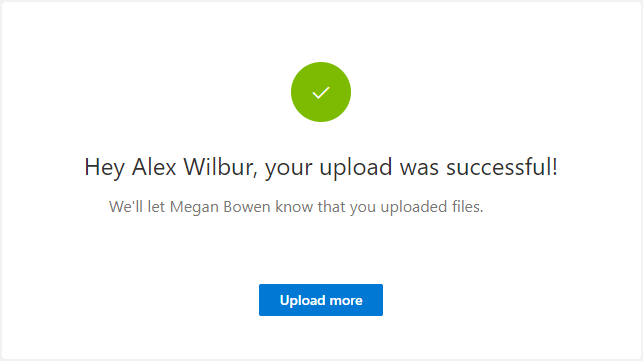
- Once all files have been selected and the name fields have been filled in, the sender will need to click on the Upload button. A confirmation window will appear when the files have been successfully submitted.

After a file is uploaded
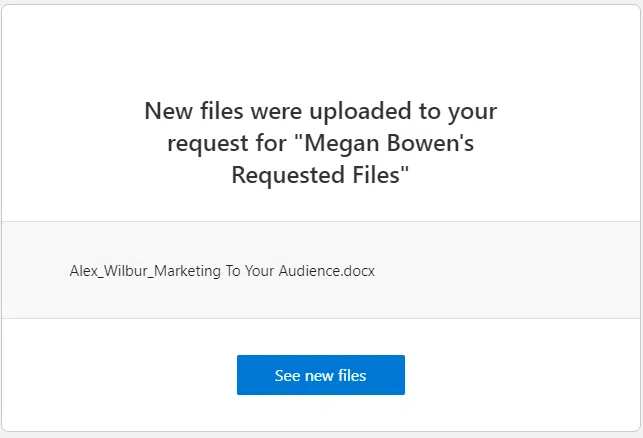
- You will receive an email to notify you that a file has been uploaded into your Request Files folder

- The files will be in the folder, and will be named with the sender’s name as the prefix to the file name.


That is all there is to it to request files from someone in a secure method, that will allow for large files. You can reuse the Request Files URL as many times as you would like and only you will be able to see the full contents of the folder. I have recently added a link to my signature for all of my emails that will allow anyone to use the link for my account.
Hopefully you have found this useful and you can use this in your business. We will continue to provide tips and tricks such as this one in the future. If there is a topic you would like to address, please feel free to send us a note via our contact form below.
[/et_pb_text][/et_pb_column][/et_pb_row][/et_pb_section][et_pb_section fb_built="1" custom_padding_last_edited="off|desktop" admin_label="Footer" _builder_version="4.7.7" use_background_color_gradient="on" background_color_gradient_start="#004872" background_color_gradient_end="rgba(41,17,96,0.8)" background_color_gradient_direction="140deg" background_color_gradient_overlays_image="on" background_image="https://signalit.net/wp-content/uploads/it-services-04.jpg" custom_margin="-2px||-2px|||" custom_padding="120px|0px|120px|0px|true|false" custom_padding_tablet="10vw||10vw||true" custom_padding_phone="5vw||5vw||true" filter_saturate="0%" da_disable_devices="off|off|off" global_module="258" saved_tabs="all" locked="off" da_is_popup="off" da_exit_intent="off" da_has_close="on" da_alt_close="off" da_dark_close="off" da_not_modal="on" da_is_singular="off" da_with_loader="off" da_has_shadow="on"][et_pb_row column_structure="2_3,1_3" use_custom_gutter="on" _builder_version="3.25" custom_padding="|||" use_custom_width="on"][et_pb_column type="2_3" _builder_version="3.25" custom_padding="|||" custom_padding__hover="|||"][et_pb_contact_form use_spam_service="on" recaptcha_list="Default|Default-0" email="[email protected]" title="We're Here To Help!" custom_message="There is a new website submission:||et_pb_line_break_holder||||et_pb_line_break_holder||Name: %%name%%||et_pb_line_break_holder||Company: %%company%%||et_pb_line_break_holder||Phone Number: %%phone%%||et_pb_line_break_holder||Email Address: %%email%%||et_pb_line_break_holder||||et_pb_line_break_holder||%%message%%" success_message="Thank you for your submission!" submit_button_text="send message" module_id="et_pb_contact_form_0" _builder_version="4.8.1" form_field_background_color="rgba(0,0,0,0)" form_field_text_color="#ffffff" form_field_focus_text_color="#ffffff" title_level="h2" title_font="Share Tech||||||||" title_text_color="#ffffff" title_font_size="50px" title_line_height="1.2em" form_field_font="Open Sans|700|||||||" form_field_letter_spacing="2px" form_field_line_height="1.8em" custom_button="on" button_text_size="15px" button_text_color="#ffffff" button_bg_color="#ffa727" button_border_width="10px" button_border_color="#ffa727" button_border_radius="100px" button_letter_spacing="5px" button_font="Open Sans|700||on|||||" button_use_icon="off" button_text_size_last_edited="off|desktop" border_width_bottom="2px" border_color_bottom="#ffffff" form_background_color="rgba(0,0,0,0)" button_bg_color_hover="#ff8a3d" button_border_color_hover="#ff8a3d" button_border_radius_hover="100px" button_letter_spacing_hover="5px"][et_pb_contact_field field_id="Name" field_title="Name" _builder_version="4.7.7" button_text_size__hover_enabled="off" button_one_text_size__hover_enabled="off" button_two_text_size__hover_enabled="off" button_text_color__hover_enabled="off" button_one_text_color__hover_enabled="off" button_two_text_color__hover_enabled="off" button_border_width__hover_enabled="off" button_one_border_width__hover_enabled="off" button_two_border_width__hover_enabled="off" button_border_color__hover_enabled="off" button_one_border_color__hover_enabled="off" button_two_border_color__hover_enabled="off" button_border_radius__hover_enabled="off" button_one_border_radius__hover_enabled="off" button_two_border_radius__hover_enabled="off" button_letter_spacing__hover_enabled="off" button_one_letter_spacing__hover_enabled="off" button_two_letter_spacing__hover_enabled="off" button_bg_color__hover_enabled="off" button_one_bg_color__hover_enabled="off" button_two_bg_color__hover_enabled="off"][/et_pb_contact_field][et_pb_contact_field field_id="Company" field_title="Company" _builder_version="4.7.7" _module_preset="default"][/et_pb_contact_field][et_pb_contact_field field_id="Phone" field_title="Phone Number" _builder_version="4.7.7" _module_preset="default"][/et_pb_contact_field][et_pb_contact_field field_id="Email" field_title="Email Address" field_type="email" _builder_version="4.7.7" button_text_size__hover_enabled="off" button_one_text_size__hover_enabled="off" button_two_text_size__hover_enabled="off" button_text_color__hover_enabled="off" button_one_text_color__hover_enabled="off" button_two_text_color__hover_enabled="off" button_border_width__hover_enabled="off" button_one_border_width__hover_enabled="off" button_two_border_width__hover_enabled="off" button_border_color__hover_enabled="off" button_one_border_color__hover_enabled="off" button_two_border_color__hover_enabled="off" button_border_radius__hover_enabled="off" button_one_border_radius__hover_enabled="off" button_two_border_radius__hover_enabled="off" button_letter_spacing__hover_enabled="off" button_one_letter_spacing__hover_enabled="off" button_two_letter_spacing__hover_enabled="off" button_bg_color__hover_enabled="off" button_one_bg_color__hover_enabled="off" button_two_bg_color__hover_enabled="off"][/et_pb_contact_field][et_pb_contact_field field_id="Message" field_title="Message" field_type="text" fullwidth_field="on" _builder_version="4.7.7" button_text_size__hover_enabled="off" button_one_text_size__hover_enabled="off" button_two_text_size__hover_enabled="off" button_text_color__hover_enabled="off" button_one_text_color__hover_enabled="off" button_two_text_color__hover_enabled="off" button_border_width__hover_enabled="off" button_one_border_width__hover_enabled="off" button_two_border_width__hover_enabled="off" button_border_color__hover_enabled="off" button_one_border_color__hover_enabled="off" button_two_border_color__hover_enabled="off" button_border_radius__hover_enabled="off" button_one_border_radius__hover_enabled="off" button_two_border_radius__hover_enabled="off" button_letter_spacing__hover_enabled="off" button_one_letter_spacing__hover_enabled="off" button_two_letter_spacing__hover_enabled="off" button_bg_color__hover_enabled="off" button_one_bg_color__hover_enabled="off" button_two_bg_color__hover_enabled="off"][/et_pb_contact_field][/et_pb_contact_form][et_pb_signup provider="activecampaign" activecampaign_list="signalit|3" layout="top_bottom" first_name_fullwidth="off" last_name_fullwidth="off" use_custom_fields="on" success_message="Thank you for your message! We will reach out to you shortly!" title="We're Here To Help!" button_text="Send Message" use_spam_service="on" recaptcha_list="Default|Default-0" disabled_on="on|on|on" _builder_version="4.8.1" _module_preset="default" form_field_background_color="RGBA(0,0,0,0)" form_field_text_color="#FFFFFF" form_field_focus_background_color="RGBA(0,0,0,0)" header_font="Share Tech||||||||" header_text_color="#FFFFFF" header_font_size="50px" header_line_height="1.2em" form_field_font="Open Sans|700|||||||" form_field_letter_spacing="2px" form_field_line_height="1.8em" background_enable_color="off" custom_button="on" button_text_size="15px" button_bg_color="RGBA(0,0,0,0)" button_border_width="3px" button_border_radius="100px" button_letter_spacing="4px" button_font="Open Sans|700||on|||||" button_use_icon="off" width="100%" border_width_bottom_fields="3px" border_color_bottom_fields="#FFFFFF" disabled="on"][et_pb_signup_custom_field field_id="Field_1" _builder_version="4.8.1" _module_preset="default"][/et_pb_signup_custom_field][/et_pb_signup][/et_pb_column][et_pb_column type="1_3" _builder_version="3.25" custom_padding="120px|||" custom_padding_tablet="0px|||" custom_padding_phone="" custom_padding_last_edited="on|tablet" padding_tablet="0px|||" padding_last_edited="on|tablet" custom_padding__hover="|||"][et_pb_blurb title="Office" use_icon="on" font_icon="%%249%%" icon_color="#ffa727" icon_placement="left" content_max_width="1100px" use_icon_font_size="on" icon_font_size="28px" _builder_version="4.7.7" header_font="Share Tech||||||||" header_font_size="24px" header_line_height="1.2em" body_font="Open Sans||||||||" body_font_size="16px" body_line_height="1.8em" background_layout="dark" custom_padding="|||" animation_style="fold" animation_delay="150ms" animation="off" locked="off"]PO Box 1025
Oswego, IL 60543
M-F: 8am – 5pm
S-S: Closed
Help Desk: 24×7
(630) 938-4757
[/et_pb_blurb][/et_pb_column][/et_pb_row][/et_pb_section][et_pb_section fb_built=”1″ admin_label=”Popup – #bookings” module_id=”bookings” module_class=”popup” _builder_version=”4.8.0″ _module_preset=”default” da_is_popup=”on” da_popup_slug=”bookings” da_disable_devices=”off|off|off” da_exit_intent=”off” da_has_close=”on” da_alt_close=”off” da_dark_close=”off” da_not_modal=”on” da_is_singular=”off” da_with_loader=”off” da_has_shadow=”on”][et_pb_row _builder_version=”4.8.0″ _module_preset=”default”][et_pb_column type=”4_4″ _builder_version=”4.8.0″ _module_preset=”default”][et_pb_code _builder_version=”4.8.1″ _module_preset=”default”][/et_pb_code][/et_pb_column][/et_pb_row][/et_pb_section]